
Follow ZDNET: Add us as a preferred source on Google.
ZDNET’s key takeaways
- PearOS is aiming for Apple’s Liquid Glass desktop.
- The distribution is far from ready for general usage.
- PearOS gives you an Apple Intelligence-like experience as well.
I’ve been keeping an eye on PearOS for some time. I covered PearOS before, calling it a Linux distro that makes your old laptop feel like a Mac.
Since that original review, the developers have decided to up the ante and bring about a Liquid Glass-like look for the distribution. And although PearOS still has its quirks — the development “team” consists of one person, which means progress is slow — the latest release has a new base, a new design, and a “new everything.”
Also: The best Linux laptops in 2025: Expert tested for students, hobbyists, and pros
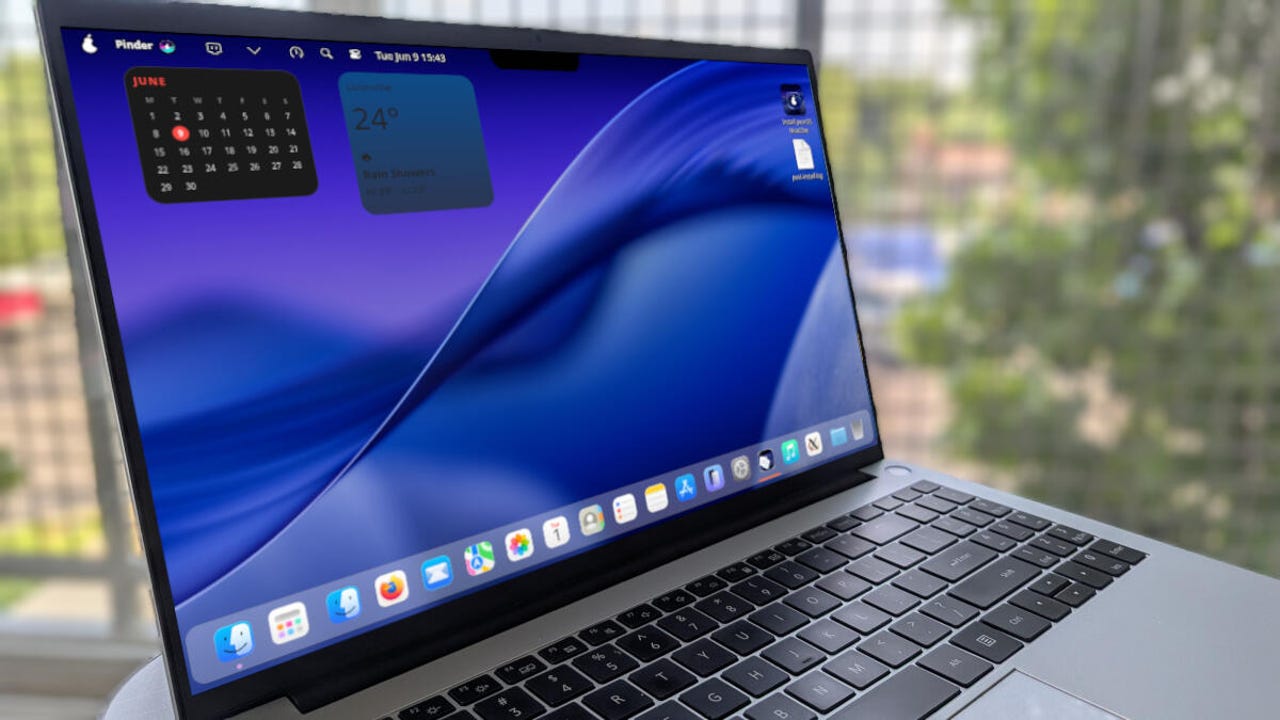
The new release is still based on Arch Linux and KDE Plasma, and is still promising the new desktop environment, Soda, but that portion of the project is still listed as “currently unavailable.” This latest version is called NiceCore and has started adding what the developer is calling a “Liquid Gel” design.
You can see what the developer is doing with Liquid Gel on the official PearOS website. I figured the NiceCore version of PearOS would include some of the Liquid Gel bits. What I saw was pretty spiffy. I’m not 100% certain if NiceCore included the Soda/Liquid Gel desktop, but I do know that this version does include the new installer (more on that in a bit). I’m not convinced that what I’m seeing is Liquid Gel, but it’s still a gorgeous desktop.
The installation
This is where things are a bit dicey with PearOS. To be perfectly honest, I remember the installation of the previous iteration to be equally as dicey. However, this time around, it seemed the installation refused to complete, and I landed on the default test account (even though I created a user account). My guess is that this is because I attempted to install PearOS as a virtual machine.
Even stranger is that the user I created during installation was there. I could see the directory in /home. But if I were to log out and attempt to switch to the user, it simply would reboot the OS. I could even change to my user account… but logging into the desktop was not happening.
OK, I’ll chalk this up to the new installer used by NiceCore.
The desktop
As I said, the NiceCore version of the PearOS desktop may or may not be Liquid Gel, but it certainly has elements of it, and I’m here to tell you that it’s a looker. From the panel to the Notch app (yeah, the developer has decided to recreate the MacOS notch), it all looks so Apple-y. At the same time, it’s all so unstable-y. If the current state of PearOS were stable, you can bet it would be a front-runner to replace Pop!_OS. Sadly, that is not the case, but I knew going into this review that I would be dealing with a project that was still in the early stages. Even with it being a non-stable release, it impressed me.
Yep, there’s even a Notch app. It doesn’t do anything at the moment, but hopefully the developer will give it some features.
Jack Wallen/ZDNET
One aspect of PearOS that caught me off guard was the built-in Piri tool (think “Siri”), which strives to bring an Apple Intelligence-like feature to the desktop. Out of the box, Piri is disabled, so you have to enable it and then allow for the 2.3GB model to download.
The Pear Intelligence feature should look instantly familiar.
Jack Wallen/ZDNET
Piri responds to voice commands and even allows you to enable Pear Intelligence (once Piri has been enabled and the model downloaded).
It’s impressive, even though (like the desktop) it’s a work in progress.
As far as other apps, the preinstalled software is limited, so you’d most likely find yourself installing several pieces (such as an office suite, image editor, etc). You do get a keyboard launcher that’s configured for file search, app launching, simple maths, and more.
The PearOS search/launcher is fantastic.
Jack Wallen/ZDNET
As well, you get the “Parari” web browser, which (oddly enough) refused to launch.
Also: 8 ways I quickly leveled up my Linux skills – and you can too
If you open the Pear Menu, you’ll see that the developer has done a great job of creating an elegant look and feel, with just the right amount of transparency and blur.
The dark theme menu does look more Liquid Glassy.
Jack Wallen/ZDNET
However, once you switch to a lighter theme (which I always do), the glassy look takes on a more frosted effect. At the same time, not all apps honored the switch from dark to light. For example, the Notes app refused to go with the lighter theme. Even so, the desktop is still gorgeous.
Why, why, why do so many distros go with a dark theme?
Jack Wallen/ZDNET
I hope, once Liquid Gel has gelled, the theme will apply to all apps, to give it a distinct MacOS Liquid Glass look and feel. I know it’s not everyone’s cuppa, but if you dig Liquid Glass and want to switch to Linux, PearOS could be a divine alternative. I only hope the developer stays on this path, because it’ll bring something fresh to the Linux desktop.
Also: Want to save your old computer? Try one of these 8 Linux distros for free
All in all, the latest iteration of PearOS looks like it will be one heck of a desktop OS. Although I wouldn’t recommend using it in its current state, you should keep an eye on this distro. When PearOS reaches a stable state, you can bet it’ll wind up as a top contender for my all-time favorite Linux distributions.