
Follow ZDNET: Add us as a preferred source on Google.
ZDNET’s key takeaways
- Wave Terminal is a terminal app on steroids.
- You get several tools in one, including AI.
- Wave Terminal is available for Linux, MacOS, and Windows.
I’ve been using the Linux terminal for decades. I’m comfortable with it, I know what I can do with it, but I no longer depend on it. With Linux becoming ever more user-friendly, the terminal can almost be considered an antiquated notion.
But then, something like Wave Terminal comes along and reminds me that the terminal remains a very useful — and powerful — tool. I’ve covered similar tools, such as Warp Terminal, before, but Wave Terminal has become my go-to.
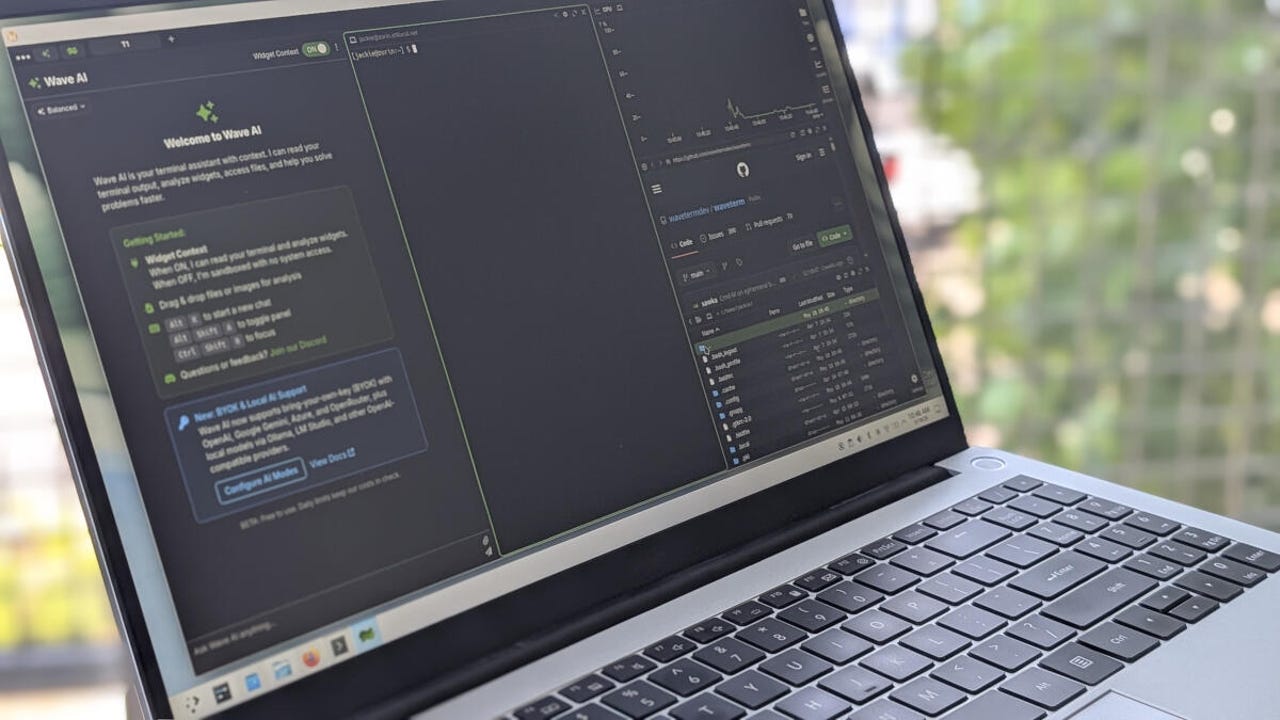
According to the Wave Terminal official site, this app is “the open source, AI-native terminal that sees your entire workspace.”
Also: Linux is getting a security wake-up call – why it was inevitable and I’m not worried
With Wave Terminal, you can view system resources, processes, GitHub repositories, use the standard CLI (Command Line Interface), and even use AI — all in one window. Wave Terminal allows you to manage remote machines, edit remote files, use a built-in web browser, and learn how to use commands.
It’s powerful.
With Wave Terminal installed (it’s currently in beta), I fired it up and, after a weekend of use, realized I was leaving it open 24/7.
Let me show you how I use Wave Terminal, so you can decide if this is a tool for you.
Installing Wave Terminal
Installing Wave Terminal is simple. On Linux, you can install it via Snap, AppImage, .deb, .rpm, .zip (source), or pacman. For example, if you want to install via .deb, you would go to the Waveterm download page, download the .deb file, and run the command:
sudo dpkg -i waveterm*.deb
If you want to install it via Snap, the command is:
sudo snap install –classic waveterm
Also: This is the most helpful new Linux tool I’ve tried in years – here’s why and how I use it
For MacOS, download the .dmg file. For Windows, download either the .exe or .msi file, then run the installer (double-click and follow the wizard).
Once installed, you’ll find a Wave Terminal entry in your desktop menu.
Using Wave Terminal
Using Wave Terminal is fairly straightforward. Once you open the app, you can enable/disable any feature you want by clicking the associated icon in the right sidebar. You can choose from:
- Terminal
- Files
- Web
- sysinfo
- processes
Wave Terminal can include as many tools as you need.
Screenshot by Jack Wallen/ZDNET
In the upper left corner, you can toggle Wave AI and create new workspaces. The workspaces feature is important because it lets you run multiple custom Wave layouts at once, so you don’t have to disable/enable features as you go.
Also: How to use Linux without ever touching the terminal
For example, you could have a workspace for your terminal app and processes, a workspace for integration with GitHub, a workspace for files and web, or whatever combination you need.
To create a workspace, click the workspace icon in the top left (two green wavy lines), and click “Create new workspace.” The caveat is that each workspace must have at least one tool open, and Wave AI doesn’t count as a tool. Because of that, you can’t have a workspace dedicated solely to AI. The good news is that you can toggle Wave AI on and off as needed.
You can create as many workspaces as needed.
Screenshot by Jack Wallen/ZDNET
All the tools are fairly self-explanatory:
- The terminal is your terminal app.
- Files open the built-in file manager.
- Web opens the built-in web browser.
- Sysinfo opens the system information tool.
- Processes opens the processes tool.
It’s not until you start using AI that things can get a bit confusing.
How to use Wave AI
First off, you can use Wave AI as a straight-up AI tool. Click to toggle Wave AI open, hit Alt+k to start a new chat, and run your first query. That’s fairly simple to understand.
Also: The first 8 Linux commands every new user should learn
However, Wave AI has another feature that can help you figure out the command you need to run. For example, say you’re new to Secure Shell and want to learn how to use it.
Type the following:
wsh ai how to use ssh
Wave AI will then give you all the information you need to learn the basics of SSH.
You can learn how to use the Linux, MaOS, or Windows terminal.
Screenshot by Jack Wallen/ZDNET
You can even instruct Wave AI with the username, IP address, and port used to connect, and it will show you the exact command to run.
There are a couple of things you’ll need to know before using Wave AI.
Also: Want to develop your Linux skills? I’ve found the perfect distro for you
The first is the Widget Context toggle. If the context toggle is off, the AI can only see your queries and attached files. You can also use Wave AI for standard queries. With the context toggle on, Wave AI can read your terminal output, capture widget screenshots, access files and directories (with approval), navigate web widgets, and use custom widget tools.
The other thing is that you must configure an AI model to work with Wave AI. To do this, click the Settings icon in the lower right corner, click Settings, and select Wave AI Modes. In the resulting window, you must configure the model you want to use in JSON format. For example, if you want to use Gemini Pro, the configuration would be:
{
“google-gemini”: {
“display:name”: “Gemini 3 Pro”,
“ai:provider”: “google”,
“ai:model”: “gemini-3-pro-preview”
}
}
If you want to use your locally installed Ollama instance, the configuration would be:
{
“ollama-llama”: {
“display:name”: “Ollama – Llama 3.3”,
“display:order”: 1,
“display:icon”: “microchip”,
“display:description”: “Local Llama 3.3 70B model via Ollama”,
“ai:apitype”: “openai-chat”,
“ai:model”: “llama3.3:70b”,
“ai:thinkinglevel”: “medium”,
“ai:endpoint”: “http://localhost:11434/v1/chat/completions”,
“ai:apitoken”: “ollama”
}
}
Click Save when you’re done.
I prefer using locally installed AI, but the choice is yours.
Also: How to generate random passwords from the Linux command line
I found Wave Terminal to be an amazing tool that helps me get things done faster and more efficiently. Give this app a try and see what you think. Just remember that Wave Terminal is in beta, so it might not always behave as expected.