How I block ads with a $7 Raspberry Pi alternative – it’s easy


A $7 ESP32-S3 is a powerful and versatile system

Adrian Kingsley-Hughes/ZDNET

Follow ZDNET: Add us as a preferred source on Google.


ZDNET’s key takeaways

  • A cheap $7 board can turn its hand to ad blocking.
  • It works as a DNS sinkhole, stripping out ads before download.
  • Other options include using a Raspberry Pi and buying hardware.

They say that necessity is the mother of invention, and the skyrocketing prices of Raspberry Pi boards have definitely been the kick in the pants that I’ve needed to look at cheaper, perhaps also better-suited, alternatives. I mean, the Pi is a great board, but for a lot of applications I’ve used it for over the almost 15 years that they’ve been around, it’s also been overkill.

The other day, I needed to put together an ad-block solution, not because I dislike ads, but simply because I was working with quite a limited bandwidth. I reflexively reached for a Raspberry Pi board, but stopped when I remembered how much they cost nowadays and put it back.

Also: I tested a Bluetooth tracker that leverages LoRa mesh networks to find things – and it’s so accurate

I was going to use PiHole on the Pi, but then I remembered coming across an ad-block project that worked on an ESP32 board. And the good news is that you can pick up one of those boards for under $10.

ESP32-S3 (left) vs ESP32 (right)

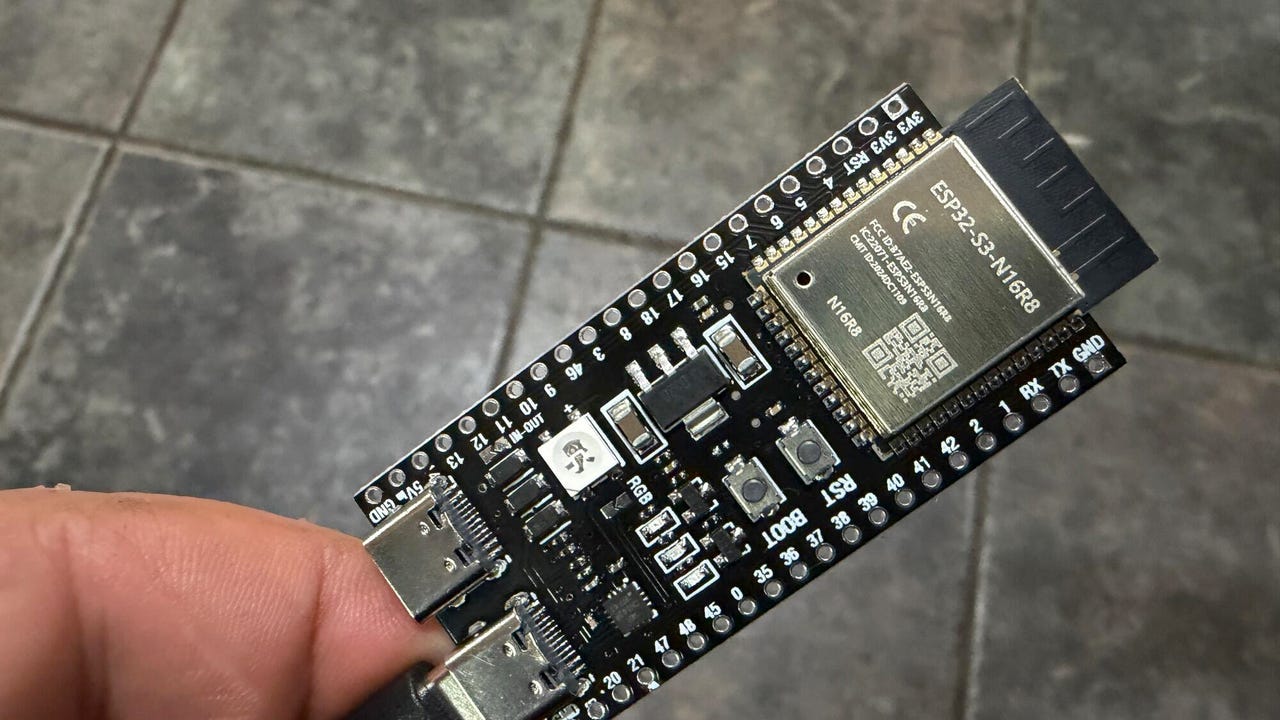
ESP32-S3 (left) vs ESP32 (right).

Adrian Kingsley-Hughes/ZDNET

Introducing the ESP32-S3

There’s a huge difference between a Raspberry Pi 5 and an ESP32 board (specifically the ESP32-S3 board). The Pi 5 is powered by a 2.4 GHz quad-core Arm Cortex-A76 64-bit chip, gigabytes of RAM, and the ability to use microSD or fast NVMe SSD storage, while the ESP32 makes use of a dual-core Tensilica Xtensa LX7 32-bit processor that can run at up to 240 MHz, 520 KB of RAM, and up to 16MB of flash storage. A Pi 5 can use as much as 12 W of power (and that’s before you hook up various HATs and such), while an ESP32 board uses milliwatts. 

For this project, I’m happy to go with the ESP32, but there are a few compromises that I’ll have to live with — more on those later.

What you need

First, you need an ESP32 board. Look for the ESP32-S3 with 8MB of PSRAM (there’s a 4MB version too, but using this board will result in compromises) rather than the classic ESP32. The ESP32-S3 is faster and more efficient, and you need this power to run the ad-block software. The cheapest way to buy these boards is in a 3-pack for $20

Also: I built my own Wi-Fi router with a Raspberry Pi for Starlink and solar control – here’s how

When you get an ESP32-S3 board for the first time, it’s normal to think, “Wow, this is tiny, there must be more to it,” but there isn’t. It really is a computer you can balance on a finger. 

Well, you will need a USB-C cable to transfer data and power the board. However, you don’t even need a microSD card for the board to work.

Also: I installed a $17 solar panel onto my doorbell camera, and it’s easily my best smart home investment

Talking of the software, you’ll also need to download ESP32_AdBlocker, which does all the hard work. You’ll also need the Arduino IDE utility to install the software onto the board. Installing the software is easy — configure the Arduino IDE application to work with the ESP32 board, open the product in the application, connect the board to your PC, and click upload. 

No coding needed -- you're just loading existing code onto the ESP32-S3.

No coding needed. Just load existing code onto the ESP32-S3.

Adrian Kingsley-Hughes/ZDNET

Note that when you connect the ESP32-S3 board to your computer, it has two USB ports. You want the one marked as COM or USB/Native (looking down at the board with the ports at the bottom, this is the port on the right). Alternatively, try a different port.

Also: I setup a $4 router reboot timer, and it’s made my internet reliably faster

If you get into trouble, there’s no end of help available. One of the biggest issues I find people run into is trying to connect the ESP32 to their computer using a charge-only USB-C cable. I also had to fiddle with the compile and board settings in the Arduino IDE software. I’ve added a screenshot below of the settings I used to get things working.  

ESP32-S3 (left) vs ESP32 (right)

Screenshot by Adrian Kingsley-Hughes/ZDNET

And finally, if you need a case for the ESP32-S3 board, you have options. You can buy one3D print one, or do a MacGyver and wrap it in a bit of electrical tape or large-diameter shrink-wrap tubing (about 1.5 inches across). 

Setting up the board

OK, so you’ve loaded the software onto the ESP32. Now it’s time for a first boot and to get the board set up. Your ESP32 board is now a network appliance.

On first boot, the ESP32 starts in Wi-Fi access point mode with an address that starts: ESP32_Adblocker_XXXXXXXXXXXX (where each X is an alphanumeric character). 

It lives.

Screenshot by Adrian Kingsley-Hughes/ZDNET

Once you’ve connected to the Wi-Fi, go to 192.168.4.1 and add the Wi-Fi SSID and password for your router. After another reboot, it’s time to specify the URL of the blocklist you want to use (you can find a massive repository of blocklists here), and then you’re pretty much done with the board.

We're in! ESP32_Adblocker successfully installed

We’re in. ESP32_Adblocker successfully installed.

Screenshot by Adrian Kingsley-Hughes/ZDNET

The only other thing to do is configure your devices to send DNS requests (more on this in a moment) to the ESP32 board. To do this, you need to take that earlier address — 192.168.4.1 — and use it as the DNS address. A good way to find out how to do this task is to check out CloudFlare’s excellent documentation for the platforms (remember to set the DNS to your ESP32’s address, not CloudFlare’s 1.1.1.1 address).

But how does it work? 

When you type a URL or click a link, your browser needs to know where on the internet that web page lives. To find this information, your browser consults an online directory called a DNS server via DNS lookup (DNS stands for Domain Naming System). 

Think of DNS as a phone directory, but for server addresses. The web page, and all the components of that web page — the images, any videos or sounds or animated under-construction GIFs, and, of course, the ads — can all be at the same location or come from different servers scattered all around the world. The browser looks up the addresses of where all these parts of the webpage are stored to build the page that it shows you. 

Now, here’s the clever bit. Because you now told your smartphone, PC, or router to ask the ESP32 board for DNS information (which is why you had to change the router’s DNS setting for this approach to work), every DNS lookup that happens is filtered by that tiny ESP32 board first. 

Also: My 7 essential laptop-bag items after decades of working remotely

The ESP32_AdBlocker software holds a blocklist of millions of addresses for internet ads, and, put simply, every time the browser requests something that’s in the blocklist, the software tells the browser that it can’t be found by pointing it to the 0.0.0.0 DNS address, and the blocked ad never loads, saving you a bit of internet bandwidth. If the address is not on that list, the board passes that DNS lookup to a proper DNS server. 

What you’ve built is a DNS sinkhole for the majority of the ads that you see on the internet.

There are limitations. For example, the strategy doesn’t work with YouTube ads because they’re served from the same server and at the same address as the videos you want to watch, so blocking these ads would block the videos. The approach also doesn’t work with newer IPv6 internet addresses. 

Also: I tested a $15 smart switch and found a coffee maker wasting $1,500 a year in electricity

But this project still shows what’s achievable with a tiny board costing under $10.

The ESP32-S3 in action filtering ads.

The ESP32-S3 in action, filtering ads.

Adrian Kingsley-Hughes/ZDNET

Not the only option

For the application I needed — a temporary solution to work with a limited-bandwidth internet connection — this approach works. And it was one of those interesting projects to play with. If I wanted a long-term solution, or I didn’t want to put a speed bump on a fast internet pipe, a Raspberry Pi Zero 2 W running PiHole is a good solution. But that approach already pushes the cost up to at least $15 for the bare board, plus a microSD card. Nothing that’s going to demand a second mortgage, but it’s a different level for sure. 

You could run PiHome on a totally separate computer, or in a virtual machine on a computer. Or buy an appliance that supports ad blocking out of the box. But what’s the fun in that? Different horses for different courses. 


Source link

Leave a Reply

Subscribe to Our Newsletter

Get our latest articles delivered straight to your inbox. No spam, we promise.

Recent Reviews


The McCarthy Road opened as a passage to the greatest copper strike the world has ever known. More than one billion pounds of copper once traveled down this corridor from the Kennecott Mines to the coast. Today, travelers head the opposite direction—up the road—to experience staggering scenery, deep wilderness, and some of Alaska’s most authentic adventures inside America’s largest national park.

The road is as notorious as it is remote, with some sources recommending satellite phones as routine safety gear. We’re here to share not only what we learned firsthand from driving the McCarthy Road ourselves, but also insights from Neil Darish, McCarthy’s outspoken statesman and longtime steward of the area. He told us that from the 1970s until about 2006 McCarthy Road was a real struggle for most people. It’s simply not like that anymore but the old stories abound. We wanted to find out for ourselves.

Wilderness adventures always carry some level of risk. But understanding what you’re getting into—and how to prepare—can turn the McCarthy Road from an intimidating unknown into one of Alaska’s most rewarding journeys.

How Long Is the McCarthy Road?

Yellow line on highway on the way to Road to McCarthy Alaska
Photo Credit: Jenn Coleman.

The McCarthy Road runs 59.4 miles from the State Wayside in Chitina (pronounced “Chit-na”) to the McCarthy Footbridge across the Kennicott River. It follows the route of the former 196-mile Copper River & Northwestern Railway, which once connected the mines to the port of Cordova.

When the mines closed in 1938, much of the track was salvaged for scrap. Floods, earthquakes, and time itself took out many bridges, leaving Kennecott and McCarthy isolated—preserved in a kind of remote time capsule that still defines the experience today.

Is the McCarthy Road Paved?

Signage on Road to McCarthy Alaska
Photo Credit: Jenn Coleman.

Mostly, no.

The McCarthy Road is primarily gravel, but for travelers willing to leave the pavement behind, it provides access to some of the most dramatic natural and historic landscapes in Wrangell–St. Elias National Park, including McCarthy and Kennecott.

Reconstruction began in earnest in the 1970s, when modern steel and concrete bridges replaced their wooden predecessors and fresh gravel was laid atop the old rail bed. What remains is rough but intentional, functional enough to reach the end, and wild enough to remind you where you are.

What Are the Road Conditions Like?

Blue bronco driving on Road to McCarthy Alaska
Photo Credit: Jenn Coleman.

The McCarthy Road is narrow and winding but relatively flat. The first few miles from Chitina toward the Copper River are paved, with occasional paved sections on steeper grades to reduce rutting.

Ironically, some of the worst potholes appear in those paved stretches, while the gravel sections are often smoother—albeit dusty and washboarded. According to the National Park Service, “under normal summer conditions, most passenger vehicles can make the trip.” That said, conditions can change quickly with weather.

How Long Does It Take to Get to McCarthy?

Highway on the way to McCarthy - Road to McCarthy Alaska
Photo Credit: Jenn Coleman.

Plan on 2–3 hours to drive from Chitina to the McCarthy Footbridge if you’re moving steadily and traffic is light. Summer weekends, especially around the Fourth of July, bring heavier traffic. It’s not gridlock, but passing opportunities are limited, and you’ll often move at the pace of the slowest vehicle.

Our advice? Drive patiently. Leave space. And when the dust gets thick, it’s often better to pull over for a photo than to white-knuckle it behind a convoy.

From Anchorage, it’s about 4.5 hours to Chitina without stops, but you’ll want to fuel up before committing to McCarthy Road. Once you park at the footbridge, it’s about a 20-minute walk into McCarthy proper.

What Is the Closest Gas Station?

Gas station - Road to McCarthy Alaska
Photo Credit: Jenn Coleman.

The closest gas station to McCarthy is in Chitina. It’s a 24-hour, credit-card-only pump with no additional services.

There is a full service station in Kenny Lake, about 90 miles from McCarthy (180 miles round trip), which offers a more comfortable fuel buffer for most vehicles. Glennallen is the last full-service town, but at 250 miles round trip, it leaves little margin unless you plan carefully, or only use it as one of the mandatory gas stops.

Can I Take a Rental Car on McCarthy Road?

Alaska 4x4 counter at Anchorage Airport
Photo Credit: Jenn Coleman.

Most national rental car companies prohibit driving to McCarthy altogether. We rented from Alaska 4×4 at the Anchorage airport and had no issues.

Not only was it permitted, but we ended up with a sweet Bronco that had excellent clearance and fresh tires. We never needed four-wheel drive, but it was reassuring to have a vehicle built for roads like this. It also made the washboard roll on the gentle cycle.

Darrish said that his guests at McCarthy Lodge Resort get scared by the warning signs at the start of McCarthy Road, but their fear isn’t justified. He said in 2006 the state DOT removed the railroad spikes by using a magnetized trailer behind a grader. When you see or read stories about taking extra tires, it’s based on 2006 and before information.

Also he said, when you see the warning sign at the beginning of McCarthy Road, telling you to take emergency equipment with you; and warning you not to travel this road because it’s “not advised” it’s important to note that’s a winter based sign!! not relevant for summer visitors!!

Is There Cell Service Along the Road?

Big bridge on Road to McCarthy Alaska
Photo Credit: Jenn Coleman.

Officially, coverage is “very limited.” Some sources go so far as to recommend carrying a satellite phone.

In practice, we had surprisingly usable Verizon service during our fall 2025 drive, though we wouldn’t count on it being consistent—or available in an emergency. Treat any cell signal as a bonus, not a plan and pay heed to the sections on car and wilderness emergency kits. Also, be sure to notify somebody you trust that you’re heading out into the wilderness, be it for hiking or driving the McCarthy Road. Darish confirmed that he finds that Verizon works on most of McCarthy Road.

What Can You See Along the Way?

Copper River Rest Area Road to McCarthy Alaska
Photo Credit: Jenn Coleman.

The McCarthy Road isn’t something to endure on the way to a destination—it is the destination.

Almost immediately after leaving Chitina, you pass through the Rock Cut, a former rail tunnel that’s now open to the sky which feels like a threshold between civilization and something wilder. At first, the road hugs the Copper and Chitina Rivers with expansive views, culminating at the Copper River Bridge.

Next, you’ll pass a chain of small lakes before reaching the single-lane Kuskulana River Bridge, often the most nerve-wracking moment for first-time drivers as you pass 238 feet above the raging Kushkulana River. The Chokosna, Gilahina, and Lakina Rivers are especially photogenic, with remnants of historic railroad trestles near the Gilihina Bridge. Long Lake lives up to its name, stretching alongside the road for more than two miles before you get your first views of the rocky Kennicott Glacier.

Darish gave us his best pro tip to truly enjoy McCarthy Road. Leaving the population centers like Anchorage Denali or Fairbanks while everyone is still asleep is a total Alaska Travel pro-tip. You’re far more likely to see wildlife along the way when the roads are empty. In addition, you’ll arrive on the McCarthy Road around 11am instead of 4pm- there’s less traffic – and you’re less likely to be behind another vehicle, even in peak July traffic.

What Services Are Available?

Available services - Road to McCarthy Alaska
Photo Credit: Jenn Coleman.

There are no service stations along the McCarthy Road, so self-sufficiency is key.

A small trading post in Chokosna sells limited snacks and drinks about halfway through the drive. Once you reach the end of the road, you’ll find espresso, food, and parking before the Kennicott River. Along the way, wayside pullouts appear roughly every 10 miles, offering parking, picnic tables, and vault toilets.

What Should You Pack in a Car Emergency Kit?

Blue bronco on Road to McCarthy Alaska
Photo Credit: Jenn Coleman.

The best emergency plan is prevention: drive slowly, check fluids, inspect tires, and make sure you have enough gas and windshield washer fluid to handle 120 dusty miles.

At minimum, you should carry:

  • A full-size spare tire
  • A working jack
  • Knowledge of how to change a tire
  • Phone charger

If you’re traveling Alaska backroads regularly, an expanded kit is wise:

What Should You Pack in a Wilderness Survival Kit?

Wilderness Survival Kit - Road to McCarthy Alaska
Photo Credit: Jenn Coleman.

With regular summer traffic, a true breakdown shouldn’t leave you stranded more than 24 hours, but preparation still matters.

Essentials include:

  • One gallon of water (for you or the vehicle)
  • Warm clothing and blankets (do not idle your car for heat)
  • No unsecured food—bear safety matters even in your vehicle (a good idea for parking too)
  • Toilet paper and a shovel
  • Essential medications
  • First-aid kit

If you’re unsure about how to keep food safe from bears, it’s best to err on the side of no food at all.

Is There an Interactive Map?

Google maps on phone
Photo Credit: Jenn Coleman.

We’re unapologetic map geeks at Coleman Concierge, so we built a custom McCarthy Road map with every stop mentioned here, and then some. We used native Google pins whenever possible for better metadata and crowd-sourced photos.

For next-level planning, open it in Google Earth to explore the terrain in 3D or drop into Street View for snapshots of the road from years past. On your phone, it works as a live navigation companion. Pair it with the National Park Service audio tour for an even deeper experience:
https://www.nps.gov/wrst/learn/photosmultimedia/audio-tours.htm

How Do You Get Into McCarthy?

Road sign on the road to McCarthy Alaska
Photo Credit: Jenn Coleman.

First: Google Maps lies.

You cannot drive directly into McCarthy proper unless you have access to a private bridge. Park at the end of the McCarthy Road and cross the footbridge on foot.

Paid parking is available at Base Camp Kennicott and McCarthy River Tours. McCarthy River Tours is slightly cheaper but farther away. Pro tip: drop passengers and luggage at the bridge first, then park. Carts are available to move bags across the bridge.

Shuttles operate from the far side of the bridge to McCarthy and Kennecott. Some activities include transportation and sometimes parking such as flightseeing with Wrangell Mountain Air, some wilderness adventures with St. Elias Alpine Guides, and stays at the Kennicott Glacier Lodge. McCarthy Lodge offers shuttle service for a fee on a per ride or per day basis. You can also walk the scenic ¾-mile road into town.

How Long Should You Stay?

Dog in McCarthy Alaska
Photo Credit: Jenn Coleman.

Our rule of thumb: stay at least as long as it takes to get there.

From Anchorage, that’s a full day each way, so plan for at least two nights in McCarthy. Fortunately, there’s more than enough to fill that time.

Two days allows for a flightseeing tour paired with rafting or hiking one day, and a glacier hike plus the Kennecott Mill tour the next. Leave time to wander Kennecott, soak up the history, and experience the Golden Saloon, the only saloon located inside a national park.

You can learn more about what to do in McCarthy from our practical guide or our photo heavy inspiration piece. You can even read both. We double dog dare you.

Are There Alternatives to Driving?

McCarthy Airport
Photo Credit: Jenn Coleman.

If the McCarthy Road still doesn’t feel right, you have options.

Flying is the easiest—scheduled service runs from Gulkana and Chitina, with charter flights available from Anchorage. It’s also the most expensive and comes with weight limits. While scenic, it doesn’t replace the experience of a dedicated flightseeing tour.

Shuttles from Chitina are another option and cost less than flying, though you still need to reach Chitina. Still, for travelers willing to leave the pavement behind, driving the McCarthy Road offers the best value—and one of Alaska’s most memorable journeys. It doesn’t just take you somewhere wild. It asks you to meet Alaska on its terms.

Disclosure: A big thank you to Alaska 4×4 for providing our awesome rental! For more Alaska 4×4 travel inspiration, check out their Instagram and Facebook accounts.

As always, the views and opinions expressed are entirely our own, and we only recommend brands and destinations that we 100% stand behind.

Ready to Book Your Trip? These Links Will Make It Easy:

Airfare:

Insurance:

  • Protect your trip and yourself with Squaremouth and Medjet
  • Safeguard your digital information by using a VPN. We love NordVPN as it is superfast for streaming Netflix
  • Stay safe on the go and stay connected with an eSim card through AloSIM

Our Packing Favs:

  • We LOVE Matador Equipment for their innovative products and sustainability focus. Their SEG45 is a game changer when you need large capacity while packing light.
  • Travel in style with a suitcase, carry-on, backpack, or handbag from Knack Bags
  • Packing cubes make organized packing a breeze! We love these from Eagle Creek

Like it? Pin it for later on Pinterest!

Hi! We are Jenn and Ed Coleman aka Coleman Concierge. In a nutshell, we are a Huntsville-based Gen X couple sharing our stories of amazing adventures through activity-driven transformational and experiential travel.


Source link