JMGO N3 Ultimate Review – Trusted Reviews


Verdict

Super bright and capable of producing a rich and detailed image, the JMGO N3 Ultimate is a brilliant smart projector. With lens shift and optical zoom built-in, too, it can get a clean, square picture without using lossy digital adjustments. It’s certainly not cheap, but if you don’t want a traditional projector, this is a brilliant, smart alternative

  • Very high brightness

  • Lens shift

  • Excellent contrast and colours

Key Features

Introduction

After years of being stuck with digital corrections for image correction, Trusted Reviews is now onto its second smart projector to feature optical zoom and lens shift, the JMGO N3 Ultimate. 

It’s also the first JMGO projector to support Dolby Vision, removing one of the minor annoyances that I had with the previous model. All this means a much bigger device, so does the loss or portability matter, or is the ultimate do-all projector? Read my full review to find out.

Advertisement

Design

  • Comes with a carry case
  • Integrated gimbal
  • Bluetooth voice remote 

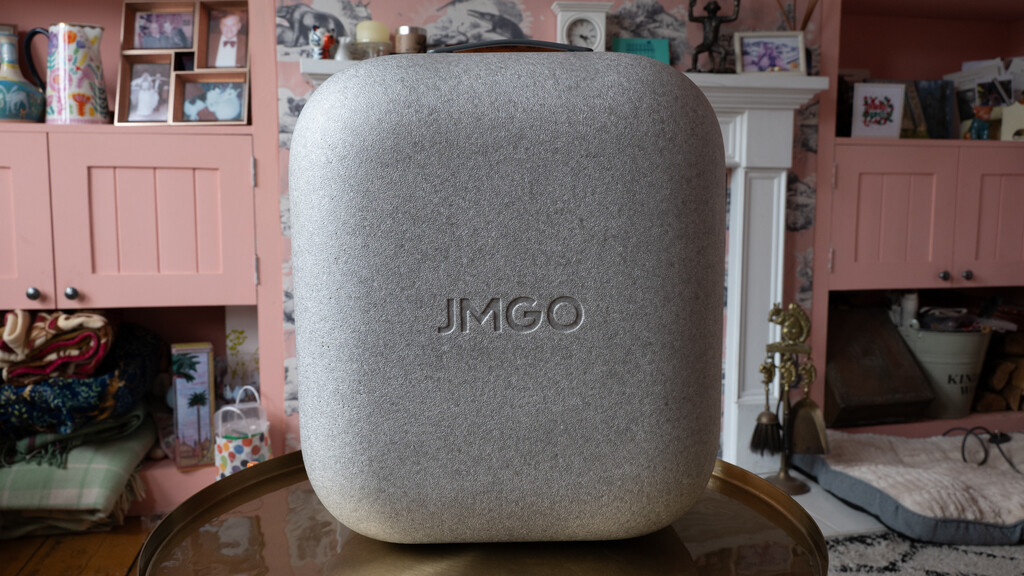
If you’ve seen previous projectors from the company, such as the JMGO N1S Ultimate 4K, then the JMGO N3 Ultimate will look familiar, only considerably bigger. It comes pre-attached to its gimbal mount and ships in a hard carry case, so there’s no need to dispose of any packaging.

JMGO N3 Ultimate carry case
Image Credit (Trusted Reviews)

I’m a big fan of these cases, as they offer protection when the projector’s not in use and do make it a bit easier to carry the JMGO N3 Ultimate around. I say a bit easier, as this projector weighs 6.95kg, making it quite a lump to move around.

Externally, the layout is very similar to other JMGO projectors, and the projector is mounted into a gimbal stand, which offers pan and tilt.

JMGO N3 Ultimate side view
Image Credit (Trusted Reviews)

Advertisement

There are two HDMI 2.1 inputs (one of which supports eARC), and a USB port located on the base of the stand, which is also where the power connects.

JMGO N3 Ultimate inputs
Image Credit (Trusted Reviews)

Power is via the provided laptop-style brick, which connects to the inlet at the back of the projector.

JMGO N3 Ultimate power brick
Image Credit (Trusted Reviews)

There’s a power button on the front, but that’s it for physical controls.

JMGO N3 Ultimate power button
Image Credit (Trusted Reviews)

Advertisement

For everything else, you’ll need to use the bundled remote control. It’s similar to other remotes for Google TV-powered projectors, with just the bare number of controls you need to navigate the interface and adjust volume.

JMGO N3 Ultimate remote
Image Credit (Trusted Reviews)

I do like the backlighting, which makes the remote easier to use at night. And it’s nice to have a customisable shortcut button joining the preset ones for Amazon Prime Video, Netflix and YouTube.

It’s a Bluetooth remote, so there’s a built-in microphone for use with the Google Assistant.

Features

  • Google TV
  • Lens shift and optical zoom
  • Automatic picture adjustment

It’ll be no surprise to find that the JMGO N3 Ultimate runs Google TV. It’s a generally good choice, as the interface is simple and bold, and all of the major apps are supported. Well, bar BBC iPlayer here. Between Google and the BBC there’s some kind of issue. If you want to stream that content, you’ll need to plug a separate media stick in.

Advertisement

JMGO N3 Ultimate Google TV
Image Credit (Trusted Reviews)

Pretty much every smart projector has some kind of integrated automatic setup routine, with automatic keystone adjustment, screen fitting and obstacle avoidance now common. All of these tend to be digital adjustments, which eat into the available resolution.

The JMGO N3 Ultimate is better than that, and has two lossless adjustment options: lens shift and optical zoom. That makes it the second smart projector to have these options, after the Xgimi Horizon 20 Max.

JMGO N3 Ultimate lens shift
Image Credit (Trusted Reviews)

For lens shift, you need to get the projector straight on to the projection surface, and then the picture can be moved +/-130% vertically and +/-53% horizontally (that’s more than the Xgimi Horizon 20 Max offers with its +/-120% vertical and +/-45% horizontal). Control of this can be done my using the dedicated button on the remote and waving it around, using the accelerometer inside to move the image; or there’s an option in the menus, controlled using the cursor keys.

In addition, there’s optical zoom, which gives a throw ratio between 0.88 and 1.7:1. That means you can get a 100-inch picture from between 1.95 and 3.76m away. In many scenarios, you won’t need to go near any other settings.

Advertisement

If you still can’t quite get the image lined up the way you want, the gimbal stand allows pan and tilt, either manually by physically moving the stand, or by using its built-in motors and the remote control to adjust it. I quite like the latter, as everything can be adjusted via the remote from the comfort of your seat.

Finally, if needed, there’s all the aforementioned automated goodies: screen fit, keystone correction and obstacle avoidance. And, there’s wall-colour compensation, so you can project onto a non-white surface without losing colour accuracy.

JMGO N3 Ultimate wall colour correction
Image Credit (Trusted Reviews)

Image modes are all selectable via the Display menu, with presets for Vivid, AI-Enhanced, Standard, Soft and Movie. HDR modes get their own presets, with Dolby Vision getting two options: Bright or Dark.

For standard content, there are two additional modes to choose from. Dynamic seems completely pointless. It ramps the projector up the maximum brightness, turns the fans to super-noisy and makes everything look green.

JMGO N3 Ultimate Dynamic picture mode
Image Credit (Trusted Reviews)

Advertisement

CineTuner Master is a potentially more useful option. It has some preset options for the type of content you’re watching, such as action movie. But, you can import another user’s settings, which might help you find the right options more easily.

JMGO N3 Ultimate scenes
Image Credit (Trusted Reviews)

Basic settings include brightness, saturation, and hue controls, plus there’s a Dark Detail Enhancement option, AI Dynamic Black Level, and a full colour tuner and 11-point white balance correction.

JMGO N3 Ultimate brightness
Image Credit (Trusted Reviews)

Picture Quality

  • Super bright
  • Black levels could be darker
  • Excellent contrast

You won’t be surprised to know that this projector uses a 0.47-inch 1080p DMD, using XPR to shift the DLP chip four times per second to build up a 4K image. It works very well, and even small text is sharp and easy to read.

Advertisement

Rated at a maximum of 5800 ISO Lumens the JMGO N3 Ultimate is incredibly bright, with its tri-laser backlight able to show a watchable picture in pretty much any room, blinds open or closed. Optimal viewing conditions require a dark room, but it’s nice to have the flexibility to watch anywhere.

With the level of brightness on offer, HDR footage can really shine in super-bright scenes that many projectors struggle with. Fire up Deadpool vs Wolverine, and the ‘flame on’ scene almost sears the eyes, although there’s still plenty of detail in the picture (a 20,000:1 contrast ratio helps).

JMGO N3 Ultimate Deadpool HDR
Image Credit (Trusted Reviews)

Dark detail control can help with very dark scenes, but it’s important to use it sparingly. Go too far and scenes can lose atmosphere. With the Running Wheel scene in Guardians of the Galaxy Vol. 3, for example, the room should be dark and moody, highlighting the wheel. With Dark detail up, it looks like a brightly lit room.

Get the balance right, and you get the right combination with plenty of detail but overall moodiness resolved.

Advertisement

JMGO N3 Ultimate GotG3 dark scene
Image Credit (Trusted Reviews)

You can see that detail at work in the opening scene of Kingdom of the Planet of the Apes, with the baby ape’s face coming to life.

JMGO N3 Ultimate Apes close-up
Image Credit (Trusted Reviews)

When the funeral pyre is lit, you get the bright orange of the flames, but you can see the hoard of apes as the camera pans back.

JMGO N3 Ultimate Apes contrast
Image Credit (Trusted Reviews)

If anything, the black level isn’t quite as deep as with the Valerion VisionMaster Pro 2, with a little bit of greying in the darker parts of the image, and the Xgimi Horizon 20 Max may be just ahead here, too.

Advertisement

For my money, the JMGO N3 Ultimate isn’t quite as sharp in fine detail as the AWOL Vision Aetherion Max. For example, in the funeral scene in apes, the Aetherion Max does a better job with the fire’s embers.

JMGO N3 Ultimate apes detail
Image Credit (Trusted Reviews)

That’s being very picky, as what the JMGO N3 Ultimate is still an exceptional projector. Its colours are bright, rich and vibrant and overall brightness is better than the competition can manage.

And, contrast really is very good. With Spider Noir, for example, watching in black and white, you get detail through the frame and the full moodiness that the show deserves. Black and white footage can be terrible for the DLP rainbow effect, but it’s not particularly pronounced on this projector.

JMGO N3 Ultimate Spider Noir
Image Credit (Trusted Reviews)

It helps with high-quality content and having Dolby Vision present. With Dolby Vision, each scene has its own metadata; HDR10 has one set of data for the entire film or TV show, so some detail can be clipped, such as the detail in the car in the Amazon Prime Video version of Mad Max Fury Road.

Advertisement

JMGO N3 Ultimate Mad Max Fury Road HDR10
Image Credit (Trusted Reviews)

Throw something sub-standard through the projector, such as early episodes of Poirot (SD, 4:3), and the JMGO N3 Ultimate upscales neatly and does a pleasant job with the limited image detail.

JMGO N3 Ultimate Poirot SD
Image Credit (Trusted Reviews)

Motion handling is very good. Standard 4K footage plays at 60Hz, due to the way that the sensor has to be shifted around. For that reason, I recommend leaving motion compensation turned on, just to smooth out any potential mismatches between source frame rates and the 60Hz output.

Watching something fast-paced, such as Ultra HD Football via Sky Q, and the super-bright image and smooth video work well.

JMGO N3 Ultimate Football
Image Credit (Trusted Reviews)

Advertisement

For gaming, Variable Refresh Rate is supported up to 240Hz, although you have drop to a resolution of 1080p to do that.

Sound Quality

  • Dual 12.5W speakers
  • Dolby Sound Processing

Dual 12.5W speakers are present for 25W of output power in total. There’s Dolby Sound Processing available, too.

JMGO N3 Ultimate left side
Image Credit (Trusted Reviews)

Similar to a lot of smart projectors, the built in audio is good enough if you don’t want the hassle of using external speakers or a soundbar. I found the projector loud, clear and there’s enough semblance of bass to make the most of music or sound effects, such as explosions or bullets.

Advertisement

There’s no real stereo separation and, while sound fills the room, there’s no clear positioning of sound. The bridge fight in Wakanda Forever, for example, should have a gunshot to the back right, but here it just sounds like it’s coming from in front.

To be fair, that’s an issue with all projectors bar the Anker Soundcore Nebula X1 Pro, which has wireless surround and front speakers.

Should you buy it?

You want a portable projector without limitation

High brightness, Dolby Vision and lens shift all make this a brilliant projector for the living room, the garden and beyond.

You want something smaller

This is a big projector and if your primary goal is to get a model you can take everywhere, you’ll want something smaller.

Final Thoughts

A clear step up in image quality and brightness from JMGO’s previous models, the JMGO N3 Ultimate distinguishes itself with lens shift and optical zoom. For those who care about getting the best picture without resorting to digital adjustments, these features are invaluable and this a brilliant smart projector.

But, the extra features do make it very large: larger even than the Xgimi Horizon 20 Max, which itself is not a small and light projector. But the JMGO has more flexibility with its lens shift and zoom, and its motorised gimbal is a nice touch.

It’s not cheap, but if you like the all-in-one nature of a smart projector and want a super-bright, clean image, the JMGO N3 Ultimate is excellent. If you want something smaller or cheaper, read the guide to the best portable projectors.

How We Test

We test every projector we review thoroughly over an extended period of time. We use industry standard tests to compare features properly. We’ll always tell you what we find. We never, ever, accept money to review a product.

Find out more about how we test in our ethics policy.

  • Tested for more than a week<br><br>Tested with real-world use

Advertisement

FAQs

What is lens shift on the JMGO N3 Ultimate?

Lens shift allows the image to be moved vertically and horizontally without the need for digital adjustment, preserving image quality.

Test Data

Full Specs

  JMGO N3 Ultimate Review
Manufacturer JMGO
Size (Dimensions) 229 x 308 x 274 MM
Weight 6.95 KG
Release Date 2026
First Reviewed Date 18/06/2026
Model Number JMGO N3 Ultimate
Resolution 3840 x 2160
Brightness Lumens 5800
Lamp Life 20,000 hours
Contrast Ratio 20,000:1
Max Image Size 300 inches
HDR Yes
Types of HDR Dolby Vision, HDR10
Refresh Rate 60 Hz
Ports 2x HDMI 2.1 (one with eARC), USB
Audio (Power output) 25 W
Display Technology DLP
Projector Display Technology 3Channel laser
Throw Ratio 0.88-1.71:1
3D Yes


Source link

Leave a Reply

Subscribe to Our Newsletter

Get our latest articles delivered straight to your inbox. No spam, we promise.

Recent Reviews


Deer Valley’s new terrain expansion is one of the most ambitious projects in modern skiing. The resort plans to nearly double its skiable terrain while maintaining the industry-leading standards it’s known for. We spent an extended trip in early 2026 skiing the new footprint alongside Deer Valley representatives and Olympic skier Fuzz Feddersen to see how it all came together.

Construction is still ongoing, and this season marked the worst snow year in Deer Valley’s history. Even so, we found the new terrain diverse and distinct, yet seamlessly integrated into the legacy Deer Valley experience.

This guide introduces the terrain, lifts, and base-area amenities in Deer Valley’s East Village so you can make the most of the Expanded Excellence initiative.

East Village: A Second Front Door

Keetley Express Opening Day
Photo Credit: Deer Valley Resort.

Deer Valley East Village is seamlessly connected on the slopes, but geographically separate from the main resort, and that separation works in its favor. Accessed via US-189, it bypasses Park City traffic entirely.

Yes, it’s still a work in progress. You’ll see active construction throughout the base area. But the core infrastructure is already in place, and it functions like a fully supported ski base. What’s here now works and what’s coming will only enhance it.

The East Village base area delivers the Deer Valley essentials: free parking, rental shop, ski valet, and East Village Restaurant, where a bowl of the resort’s signature chili tastes especially good on a cold afternoon.

Where to Stay in East Village (25/26 Season)

High hot chocolate at Grand Hyatt Deer Valley Utah
Photo Credit: Jenn Coleman.

For the 25/26 season, the clear lodging choice is the newly completed Grand Hyatt. It offers a signature restaurant, on-site Ski Butlers rentals, a full spa, and shuttle service to Park City and Snow Park. There’s no ski-in/ski-out access yet, but a short shuttle brings you directly to the East Village base.

Additional hotels are expected to open for 26/27, which will further transform East Village into a true walkable ski hub.

We found the Grand Hyatt welcoming and highly functional, particularly with Ski Butlers on-site and a massive locker room that makes gearing up painless. Their High Hot Chocolate service, modeled after high tea but featuring locally processed cocoa, may become a new tradition for us. It’s indulgent enough to stand in for a light meal or serve as a sweet reset between Park City’s famously rich dinners.

The only logistical wrinkle is shuttle coverage. Service does not extend to Empire Canyon (Fireside Dining) or Silver Lake (Stein Eriksen Lodge, Mariposa), so a bit of planning is required. Still, between Snow Park (St. Regis, Cast & Cut) and downtown Park City, dining options are abundant. With new hotels opening next season, you may soon be able to walk to a different restaurant every night and still not try them all.

Snow Science: The Engine Behind the Expansion

Expanded Terrain snowmaking gun
Photo Credit: Deer Valley Resort.

Deer Valley’s reputation has always been built on snow quality, from immaculate corduroy to sophisticated snowmaking. The expansion continues that legacy in a serious way.

The new terrain draws most of its water from Jordanelle Reservoir. Roughly 80 miles of new snowmaking pipe now support more than 1,200 high-efficiency snow guns. The reservoir isn’t just scenic, it’s foundational.

What’s more impressive is the sustainability loop. Deer Valley is allocated just 1% of the reservoir’s available water. Through dedicated irrigation channels, approximately 80% of that allotment is returned by season’s end. Combined with an expanded grooming fleet, that system allowed the resort to open a record number of runs during a historically hot and dry winter.

If you’re wondering how the terrain skied so well in a lean year, this is your answer.

East Village Gondola: The Spine of the New Terrain

East Village Gondola
Photo Credit: Deer Valley Resort.

The 10-passenger high-speed East Village Gondola is one of the two primary lifts out of the base area. It’s a 15-minute, 3,000-vertical-foot ride to Park Peak (9,350’), with a mid-station at Big Dutch Peak (8,170’).

From Park Peak, you access some of Utah’s longest runs along with terrain served by Pinyon Express and the Vulcan Express / Revelator Express lifts.

Green Monster is the headline act: a 4.85-mile green descent between Park Peak and Baldy Mountain, nearly 40% longer than Park City Mountain’s Home Run. It weaves between two blues: Carbonite, which drops along the ridge, and Age of Reason, which follows the valley floor.

Deer Valley partnered with longtime Mountain Host Michael O’Malley to name the new terrain in ways that honor both local mining history and the resort’s evolving identity. “Green Monster” references a Wasatch County copper mine, though you’ll never convince me there isn’t a double entendre for the 37-foot-tall wall in Fenway Park that has foiled many home runs. Common sense tells us that “Age of Reason” is an homage to Thomas Paine, and I could imagine cruising down the exposed ridge would freeze you like the compound that imprisoned Han Solo. However, “Carbonite” is a nod to Park City’s silver mining legacy. 

Names aside, the terrain progression is smart. Carbonite offers a manageable ridge experience before committing to Redemption Ridge. And if confidence wavers, Green Monster provides a bailout.

Another thoughtful touch is Corduroy Lunch. Select freshly groomed terrain off the gondola’s mid-station remains roped until noon. Carving fresh tracks midday is a true afternoon delight. 

Keetley Express: The Connector

Keetley Express lift Deer Valley Ski Resort Utah
Photo Credit: Deer Valley Resort.

Keetley Express is the other primary East Village lift and likely the fastest gateway back to legacy Deer Valley terrain. After the 1.25-mile ride up, a short ski down Road to Sultan brings you to Sultan Express.

Of course, you have to take Sultan up the mountain before you get back to skiing. That sets you up for over 5 continuous miles of green runs if you combine Homeward Bound with McHenry, or take a run on the classic black Stein’s Way. You could also use connectors to access the lower half of Green Monster or McHenry directly, or try the plethora of intermediate runs off Keetley Point.

Advanced skiers should keep Keetley on their radar as well. When conditions align, it’s a sneaky access point to Mayflower Bowl and its quiet pocket of expert terrain.

Aurora: Small but Essential

McHenry / Aurora area Deer Valley Ski Resort Utah
Photo Credit: Jenn Coleman.

Aurora is easy to underestimate. It’s only about 700 feet long and takes two minutes to ride, but it plays a crucial role.

It’s the return lift from McHenry, which connects directly to Silver Lake Lodge, and it services Keetley Point terrain. There’s also a confusing sign near the top of Aurora on Green Monster directing skiers left toward East Village. If you follow it, you’ll earn a short Aurora ride, and remember to hang right next time if you want to return directly to Keetley and the gondola.

Tiny lift. Big utility.

Vulcan Express & Revelator Express: Commitment Terrain

Woman carving Ridgeline at Deer Valley
Photo Credit: Deer Valley Resort.

These lifts rise from one of the steepest valleys in the Deer Valley footprint, so steep that lift towers had to be installed by helicopter.

Redemption Ridge is the signature descent, often described as Stein’s Way on steroids. At roughly twice the length of Stein’s, it drops 2,700 vertical feet over 2.5 miles. Once you commit, you’re in it, with steeper, more technical lines breaking off the ridgeline into the valley.

If that feels ambitious, start on Stein’s to calibrate. Carbonite also offers a similar exposed-ridge experience that’s much more forgiving. But If the snow is right and you can hang, Redemption could be your saving grace from the Bambi Basin blues.

Pinyon Express: High-Alpine Access for Everyone

Pinyon Express Chairlift
Photo Credit: Deer Valley Resort.

Pinyon Express and Revelator both reach Park Peak, but their personalities diverge from there.

Pinyon serves a beginner-friendly zone on the north side of Park Peak, allowing newer skiers to experience high-mountain terrain without intimidation. Clipper stands out because it also connects the East Village Gondola back into legacy Deer Valley terrain, but there are multiple easy route options.

Because Pinyon sits right at the boundary between old and new terrain, it functions as a seamless crossover point. Novice skiers and ski classes can access this alpine playground from either side of the resort.

The Future of Deer Valley Is Already Underfoot

Fuzz_Ski_with_a_Champion
Photo Credit: Deer Valley Resort.

It would be easy to judge an expansion like this on acreage alone. Nearly doubling skiable terrain is headline material in any snow year, let alone the driest season in resort history. But what impressed us most wasn’t the scale; it was the intention.

Expanded Excellence doesn’t feel bolted on. It feels studied. Deliberate. The lift placements make sense. The terrain progression makes sense. Even the names tell a story. You can ski a 4.85-mile green down Green Monster, test your mettle on Redemption Ridge, duck into legacy terrain off Keetley, and end the day with corduroy that rivals anything Deer Valley has ever groomed, all without feeling like you’ve left the original footprint of the resort.

That’s no small feat.

Skiing with Olympic veteran Fuzz Feddersen gave us an insider’s lens, but even without that access, the throughline is obvious: Deer Valley isn’t chasing growth for growth’s sake. They’re building a second front door that will eventually feel as iconic as Snow Park or Silver Lake, and they’re doing it with the same snow science, guest service, and meticulous grooming that built their reputation in the first place.

East Village still hums with construction equipment. You’ll see cranes on the skyline and fresh dirt where hotels will soon rise. But beneath that temporary noise is something permanent: infrastructure that works, terrain that skis well in lean years, and a blueprint that positions Deer Valley for the next several decades.

If this was Expanded Excellence in the worst snow year on record, it’s hard to imagine what it will feel like in a banner winter.

One thing is certain: the future of Deer Valley isn’t coming. It’s already here!

Ready to Book Your Trip? These Links Will Make It Easy:

Airfare:

Insurance:

  • Protect your trip and yourself with Squaremouth and Medjet


  • Safeguard your digital information by using a VPN. We love NordVPN as it is superfast for streaming Netflix


  • Stay safe on the go and stay connected with an eSim card through AloSIM

Our Packing Favs:

  • We LOVE Matador Equipment for their innovative products and sustainability focus. Their SEG45 is a game changer when you need large capacity while packing light.
  • Travel in style with a suitcase, carry-on, backpack, or handbag from Knack Bags
  • Packing cubes make organized packing a breeze! We love these from Eagle Creek

Disclosure: A big thank you to Deer Valley Resort for hosting us, setting up a fantastic itinerary, and usage of some of the images throughout (image credit in hover text ).

For more travel inspiration, check out Deer Valley Resort’s InstagramFacebookTwitter, and YouTube accounts.

As always, the views and opinions expressed are entirely our own, and we only recommend brands and destinations that we 100% stand behind.

Like it? Pin it for later on Pinterest!


Hi! We are Jenn and Ed Coleman aka Coleman Concierge. In a nutshell, we are a Huntsville-based Gen X couple sharing our stories of amazing adventures through activity-driven transformational and experiential travel.


Source link